Supabase CLI Backup Guide: How to Dump Roles, Schema, and Data

Need a portable backup of your Supabase database?
The Supabase CLI lets you create a logical database backup using supabase db dump. For a complete backup workflow, Supabase currently recommends exporting your database into three separate files:
roles.sql
schema.sql
data.sql
These files contain your database roles, structure, and actual records.
The basic commands are:
supabase db dump --db-url "[CONNECTION_STRING]" -f roles.sql --role-only

supabase db dump --db-url "[CONNECTION_STRING]" -f schema.sql

supabase db dump --db-url "[CONNECTION_STRING]" -f data.sql --use-copy --data-only -x "storage.buckets_vectors" -x "storage.vector_indexes"
This is the current backup workflow documented by Supabase for creating logical SQL backups that can later be used for migration or restoration.
Let’s go through exactly what each command does and how to create your backup safely.
What Is a Supabase CLI Backup?
A Supabase CLI backup is a logical export of your PostgreSQL database created with the supabase db dump command.
Supabase is built on PostgreSQL, so the CLI uses PostgreSQL’s pg_dump internally. However, Supabase adds its own filtering to account for the schemas, roles, and database objects managed by the platform.
That makes the Supabase CLI preferable to blindly running a standard pg_dump command against a hosted Supabase project.
A logical backup is particularly useful when you want to:
- Keep a database copy outside Supabase
- Migrate to another Supabase project
- Move to self-hosted Supabase
- Keep long-term backups yourself
- Create a copy before a risky migration
- Maintain off-site backups
- Restore data into another PostgreSQL environment
This is also different from Supabase’s newer physical backups.
Projects running Postgres 15.8.1.079 or later use Supabase’s physical backup process by default. Those backups are primarily designed for managed restoration inside Supabase. If you want your own logical copy, Supabase directs users to the CLI db dump command.
Why Does Supabase Split the Backup Into Three Files?
You could think of a PostgreSQL database as having three important layers:
1. Roles
Roles control database identities and permissions.
They can include custom database roles your application depends on.
The backup file will be:
roles.sql2. Schema
The schema describes how the database is structured.
This can include things such as:
- Tables
- Columns
- Views
- Functions
- Triggers
- Indexes
- Constraints
- Policies
- Sequences
The backup file will be:
schema.sql3. Data
This is the actual information stored inside your tables.
For example:
users
orders
invoices
customers
products
subscriptions
The data backup file will be:
data.sqlSeparating these components gives you a cleaner restore workflow:
Supabase Database
       │
       ├── roles.sql
       ├── schema.sql
       └── data.sql
Supabase’s current backup-and-restore documentation uses this three-file approach.
Before You Create a Supabase CLI Backup
You need a few things before running the backup.
Install the Supabase CLI
If your project uses npm, you can install the CLI as a development dependency:
npm install supabase --save-devThen run commands with:
npx supabaseFor example:
npx supabase db dumpSupabase currently requires Node.js 20 or newer when running its CLI through npm or npx. Global installation options are also available through package managers such as Homebrew, Scoop, and Linux packages.
Throughout this guide, I will use:
supabaseIf you installed it with npm instead, simply replace it with:
npx supabaseMake Sure Docker Is Running
This catches many developers by surprise.
The Supabase CLI requires a Docker-compatible container runtime for database operations because it runs pg_dump from a Supabase PostgreSQL container rather than requiring the matching PostgreSQL tools to be installed directly on your machine.
Make sure Docker Desktop or another compatible Docker runtime is running before starting.
Step 1: Get Your Supabase Database Connection String
Open your project in Supabase.
Click:
Connect
Supabase currently recommends using the Session pooler connection string by default. If your network supports IPv6 or you have Supabase’s IPv4 add-on, you can also use the direct database connection.
A session pooler connection string looks similar to:
postgresql://postgres.[PROJECT-REF]:[YOUR-PASSWORD]@aws-0-us-east-1.pooler.supabase.com:5432/postgresA direct connection looks similar to:
postgresql://postgres.[PROJECT-REF]:[YOUR-PASSWORD]@db.[PROJECT-REF].supabase.com:5432/postgresReplace:
[YOUR-PASSWORD]with your actual database password.
If you no longer know your database password, you can reset it from your project’s database settings.
Keep Your Connection String Private
Your connection string contains database credentials.
Do not put it directly into:
- Public GitHub repositories
- Screenshots
- Blog posts
- Public logs
- Frontend JavaScript
- Shared configuration files
For automated backups, store credentials using environment variables or your CI platform’s secret management system.
Step 2: Back Up Your Supabase Database Roles
Start by exporting the roles:
supabase db dump \
  --db-url "[CONNECTION_STRING]" \
  -f roles.sql \
  --role-only
This creates:
roles.sqlThe important flag here is:
--role-onlyIt tells the CLI to export database roles instead of the normal schema dump.
Supabase’s CLI documentation notes that a standard db dump does not include custom roles unless --role-only is explicitly used.
So don’t assume that exporting the schema automatically gives you your custom roles as well.
Step 3: Back Up Your Supabase Schema
Now export the database structure:
supabase db dump \
  --db-url "[CONNECTION_STRING]" \
  -f schema.sql
This creates:
schema.sqlNotice that we don’t use:
--data-onlyor:
--role-onlyfor this command.
By default, supabase db dump produces the schema dump rather than your table data.
This file represents the structure needed to recreate the relevant database objects later.
Step 4: Back Up Your Supabase Data
Next, export the actual table records:
supabase db dump \
  --db-url "[CONNECTION_STRING]" \
  -f data.sql \
  --use-copy \
  --data-only \
  -x "storage.buckets_vectors" \
  -x "storage.vector_indexes"
This creates:
data.sqlThere are three important parts here.
--data-only
This tells the CLI to export the data rather than the database schema.
--use-copy
This makes the dump use PostgreSQL COPY statements rather than individual inserts.
Supabase’s official backup workflow currently uses --use-copy for its data export.
-x
The -x or --exclude option excludes selected tables from a data-only dump.
Supabase’s current guide excludes:
storage.buckets_vectors
storage.vector_indexes
when preparing a logical backup for migration between Supabase projects.
After the command finishes, your directory should contain:
roles.sql
schema.sql
data.sql
You now have the three core components of your logical database backup.
What Does supabase db dump Actually Do?
The command isn’t simply a renamed version of pg_dump.
Behind the scenes, the Supabase CLI runs PostgreSQL’s pg_dump inside a container and adds Supabase-specific behavior.
According to Supabase, the CLI filters platform-managed components, including internal schemas and reserved roles, to make the resulting dump more appropriate for Supabase migration and restore workflows.
This is particularly important because a hosted Supabase database contains platform-managed components in addition to the tables you create yourself.
Running raw pg_dump without accounting for those differences can produce objects or permissions that cause problems during restoration.
For most Supabase developers, starting with:
supabase db dumpis therefore simpler than building a custom pg_dump command yourself.
Can I Back Up a Linked Supabase Project Instead?
Yes.
The CLI also supports linked projects.
A typical development workflow starts with:
supabase loginfollowed by:
supabase link --project-ref YOUR_PROJECT_REFOnce your local project is linked, certain database commands can operate against the linked Supabase project.
For explicit backup scripts, however, using:
--db-urlmakes it very clear which database you are exporting.
That can be useful when working with several environments such as:
development
staging
production
Verify Your Supabase Backup
A command completing without an obvious error does not mean you should blindly trust the resulting backup forever.
Check that the files were actually created.
On Linux or macOS:
ls -lh roles.sql schema.sql data.sqlYou should see all three files and their sizes.
For example:
roles.sql
schema.sql
data.sql
The data.sql file will often be much larger than the other two if your project contains significant application data.
You can also inspect the beginning of a file:
head schema.sqland:
head data.sqlDon’t manually edit these files unless you understand the consequences.
For an important production database, the stronger verification is a test restore into a safe environment.
A backup is much more valuable when you already know the restore process works.
How Are These Files Restored?
The complete restore process deserves its own guide, but understanding the order helps explain why the backup is split into separate files.
Supabase’s current CLI restore workflow uses psql and loads the files in this general sequence:
roles.sql
     ↓
schema.sql
     ↓
data.sql
Supabase documents a restore command using a single transaction, ON_ERROR_STOP, the three files, and a temporary session_replication_role setting while importing the data.
That means your backup isn’t just a collection of random SQL files.
Each one has a specific role in reconstructing the database.
Does a Supabase CLI Backup Include Auth?
This requires some care.
The default behavior of supabase db dump excludes Supabase-managed schemas such as auth and storage. The CLI documentation explicitly lists managed schemas among those filtered from normal dumps.
Supabase has additional migration procedures when you need to preserve or recreate changes involving these managed schemas.
For example, if you modified the auth or storage schemas by adding your own triggers or Row Level Security policies, Supabase’s migration documentation provides additional db diff steps for capturing those custom changes.
So if your project has customized Supabase-managed schemas, don’t assume a basic three-command backup covers every migration requirement.
Does supabase db dump Back Up Storage Files?
No.
This is one of the most important backup limitations to understand.
Your PostgreSQL database can contain metadata describing Supabase Storage objects, but the actual uploaded files are stored separately.
Supabase explicitly states that database backups do not include objects stored through the Storage API.
For example, your application might contain:
Database
├── users
├── invoices
├── orders
└── storage metadata

Supabase Storage
├── avatar.jpg
├── invoice.pdf
├── product.webp
└── video.mp4
A database dump does not automatically turn those Storage files into part of data.sql.
If Storage is important to your application, you need a separate Storage backup strategy.
Common Supabase CLI Backup Problems
Docker is not running
You may have the CLI installed correctly but still see errors when db dump starts.
Because the CLI uses Docker for this operation, check that your Docker daemon is actually running.
The direct database connection doesn’t work
Supabase’s direct database connection relies on IPv6 unless you have appropriate IPv4 support.
If your network cannot use it, try the Session pooler connection string that Supabase recommends by default for this workflow.
Database password contains special characters
The CLI reference notes that database URLs passed through --db-url need to be properly percent-encoded.
If your password contains URL-sensitive characters, an incorrectly constructed connection string can cause authentication or parsing errors.
schema.sql doesn’t contain my table data
That’s expected.
A normal:
supabase db dumpexports the schema.
You need:
--data-onlyto export your table records.
My custom roles aren’t in schema.sql
That’s also expected.
Export roles separately using:
supabase db dump \
  --db-url "[CONNECTION_STRING]" \
  -f roles.sql \
  --role-only
Should You Store These Backup Files in Git?
Be careful here.
A production data.sql file can contain sensitive application information.
Depending on your application, that might include:
- Customer information
- Email addresses
- Business records
- Private application data
- Internal identifiers
- Other sensitive database content
A public Git repository is generally not an appropriate place for a production database backup.
Store production backup files in a controlled backup destination with appropriate permissions instead.
Supabase does provide an official GitHub Actions example for periodic database backups, but you should evaluate carefully where production data is ultimately stored and who can access it. The official workflow demonstrates scheduled exports of roles, schema, and data using the same CLI commands covered above.
Manual CLI Backup vs Automated Backup
The Supabase CLI works well when you need a backup right now.
For example:
Before database migration
        ↓
Run CLI backup
        ↓
Verify files
        ↓
Deploy migration
The weakness of a manual process is not the backup itself.
It’s remembering to do it consistently.
For a production application, you may eventually want:
Supabase
    ↓
Scheduled database backup
    ↓
Off-site storage
    ↓
Backup history
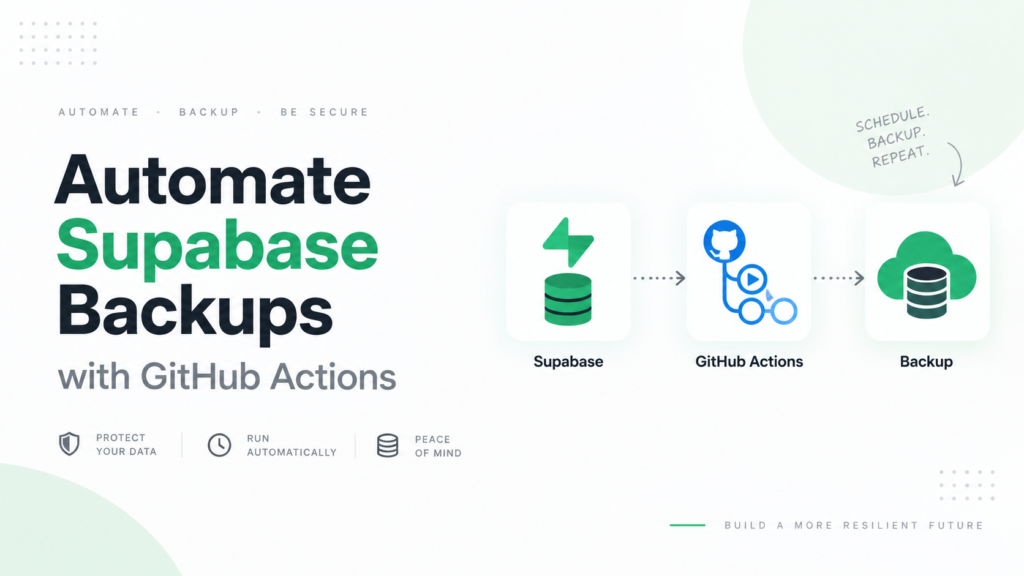
Supabase documents GitHub Actions as one way to automate its CLI backup workflow.
If you prefer to keep automated Supabase database backups in your own Google Drive without maintaining a backup script yourself, SupaBackup is designed for that workflow.
The two approaches solve the same recurring problem differently:
| Approach | Best for |
|---|---|
| Supabase CLI | Manual backups and developer-controlled workflows |
| GitHub Actions + CLI | Teams comfortable maintaining their own automation |
| SupaBackup | Automated off-site backups without maintaining backup scripts |
You can still use Supabase’s native managed backups alongside an independent logical backup strategy.
A Simple Supabase CLI Backup Checklist
Before considering the backup complete, check that you have:
roles.sqlschema.sqldata.sql- Verified that the files exist
- Stored them somewhere secure
- Kept database credentials out of the backup repository
- Planned separately for Supabase Storage files
- Tested your restore process if the database is important
The actual dump commands are straightforward.
Knowing what is and is not included is what makes the backup useful.
Key Takeaways
A Supabase CLI backup can be created with three main supabase db dump commands:
supabase db dump --db-url "[CONNECTION_STRING]" -f roles.sql --role-only

supabase db dump --db-url "[CONNECTION_STRING]" -f schema.sql

supabase db dump --db-url "[CONNECTION_STRING]" -f data.sql --use-copy --data-only -x "storage.buckets_vectors" -x "storage.vector_indexes"
The result is:
roles.sql
schema.sql
data.sql
Supabase uses pg_dump underneath the CLI while applying platform-specific filtering. The resulting files give you a logical, portable database backup rather than relying exclusively on Supabase’s managed physical backup system.
Just remember that a database dump is not a backup of your actual Supabase Storage files. Those need to be protected separately.
For developers who only need occasional backups, the CLI may be enough.
For projects that need regular off-site copies, automate the process rather than relying on someone to remember to run the commands.