How to Restore a Supabase Backup to a New Project
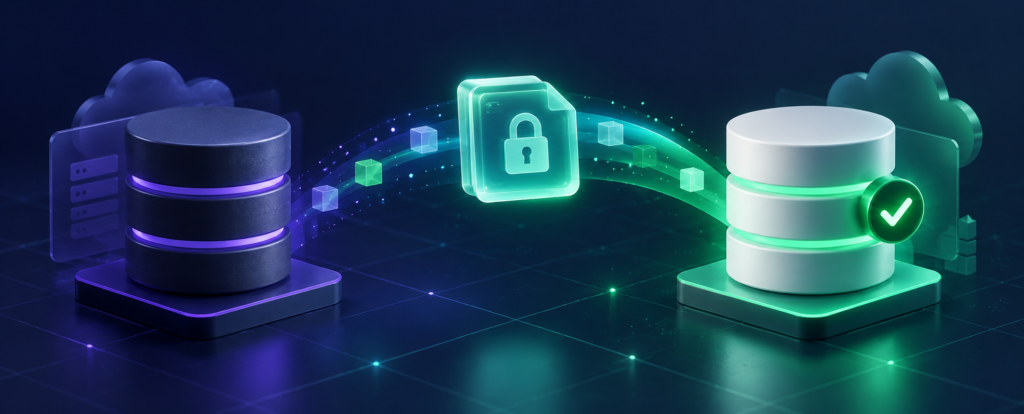
To restore a Supabase backup to a new project, first identify the backup type. Paid projects with physical backups or Point-in-Time Recovery can use Supabase’s Restore to a New Project dashboard feature. For a downloadable .sql, .sql.gz, .dump, or .backup file, create a new Supabase project, enable required extensions, obtain its database connection string, and restore the file using psql or pg_restore.
The database restore is only part of the migration. You must also update application credentials and manually handle items such as Storage files, Edge Functions, Auth provider settings, Realtime configuration, webhooks, and secrets.
This guide explains both restore methods, shows the correct command for each common backup format, and provides a validation checklist before you direct production traffic to the new project.
Choose the correct Supabase restore method
Start by matching your backup source to the appropriate restore path.
| What you have | Recommended restore method |
|---|---|
| Physical backup from a paid Supabase project | Dashboard: Restore to a New Project |
| Supabase PITR recovery point | Dashboard: select a date and time, then restore to a new project |
roles.sql, schema.sql, and data.sql from Supabase CLI | Restore all three with psql in Supabase’s recommended order |
A single plain .sql file | Restore with psql |
A compressed .sql.gz file | Decompress as a stream and pipe into psql |
A custom-format .dump or .backup archive | Inspect and restore with pg_restore |
| An encrypted backup from a backup service | Decrypt it using the service’s supported process, identify the resulting format, then use the matching method |
Do not choose a command based only on the filename. A file named backup.dump may still contain plain SQL. On Linux or macOS, inspect it with:
file backup-fileYou can also test whether PostgreSQL recognizes it as a custom archive:
pg_restore --list backup-fileIf pg_restore reports that the file appears to be a text-format dump, restore it with psql instead.
Before you restore the backup
A few checks prevent most failed or incomplete restores.
Keep the original project untouched
Restore into a newly created, disposable target project. Do not delete, pause, or modify the source until the new environment has passed database, authentication, Storage, and application tests.
Confirm what the backup includes
A database backup may include tables, data, functions, indexes, policies, triggers, and some role definitions. It does not automatically represent every part of a Supabase project.
Supabase’s backup documentation states that database backups contain metadata about Storage objects, not the actual files stored through the Storage API. Edge Functions, project API keys, Auth provider configuration, and several dashboard settings also require separate handling.
Record the source configuration
Before starting, document:
- PostgreSQL version
- Enabled extensions
- Database webhooks
- Realtime publications
- Storage buckets and their access settings
- Edge Functions and environment secrets
- Auth providers, redirect URLs, and SMTP settings
- Custom domains and network restrictions
- Scheduled jobs and external integrations
- Approximate row counts for important tables
This inventory becomes your restore checklist.
Use compatible PostgreSQL tools
Install psql and pg_restore from a PostgreSQL client version that is the same as or newer than the server version that produced the dump. Check locally with:
psql --version
pg_restore --version
If the dump was created by a newer pg_dump, an older pg_restore may return an “unsupported version in file header” error.
Method 1: Restore a physical backup or PITR point from the dashboard
For eligible paid projects with physical backups enabled, Supabase provides a managed Restore to a New Project workflow. This is the simplest path because Supabase creates the destination project and copies the database automatically.
According to Supabase’s current Restore to a new project guide, the feature transfers:
- Database schemas, tables, views, procedures, data, and indexes
- Database roles and permissions
- Auth user data, including hashed passwords and authentication records
- The encryption root key, allowing supported Vault secrets and encrypted columns to remain readable
Steps to restore from the dashboard
- Open the source project in the Supabase Dashboard.
- Go to Database → Backups.
- Select Restore to a New Project.
- Choose an available physical backup.
- If PITR is enabled, select the required date and time within the recovery window.
- Review the new project’s expected configuration and cost.
- Start the restore and wait for Supabase to create the new project.
- Open the new project and validate its data before connecting an application.
Supabase replicates selected infrastructure settings, including compute size, disk attributes, SSL enforcement, and network restrictions. The restored data stays in the same region as the source project.
Important limitations
The dashboard process creates a database-only copy, not a complete project clone. Supabase lists Storage objects and settings, Edge Functions, Auth settings and API keys, Realtime settings, read replicas, and some database settings among the items that need manual reconfiguration.
The new project also begins generating its own charges. Review the cost shown before confirming, especially when the source uses upgraded compute or disk settings.
At the time of writing, a project created through this restore flow cannot itself be used as the source for another clone. The feature is also limited to paid projects with physical backups enabled.
After cloning, review extensions capable of external activity, such as pg_cron, pg_net, and wrappers. A restored job or network integration should not accidentally contact production services from the new project.
Method 2: Restore Supabase CLI SQL files with psql
Supabase’s manual workflow separates a logical backup into three files:
roles.sql
schema.sql
data.sql
This order matters. Roles must exist before objects refer to them, and the schema must exist before table data can be inserted.
Step 1: Create the destination project
Create a new Supabase project in the required organization and region. Wait until database provisioning finishes.
Choose a database password that you can safely store in a password manager. The new project will have a new project reference, URL, API keys, and connection string even when the restored data matches the source.
Step 2: Enable extensions and webhooks
In the new project:
- Enable every non-default extension required by the source database.
- Enable Database Webhooks if the old project used them.
- Review extension versions if the projects run different PostgreSQL versions.
Missing extensions can cause functions, column types, indexes, or operators in schema.sql to fail.
Step 3: Copy the new database connection string
Open the new project’s Connect panel. Supabase recommends using the Session pooler connection string by default. Use the direct connection when your network supports IPv6 or the project has an IPv4 add-on.
The Session pooler format looks like:
postgresql://postgres.NEW_PROJECT_REF:NEW_PASSWORD@REGION.pooler.supabase.com:5432/postgresStore it temporarily in an environment variable:
export NEW_DB_URL='postgresql://postgres.NEW_PROJECT_REF:NEW_PASSWORD@REGION.pooler.supabase.com:5432/postgres'If the password contains reserved URI characters such as @, :, /, ?, or #, percent-encode it before placing it in the URL. Do not commit the connection string to Git or paste it into public logs.
Step 4: Test the connection
psql "$NEW_DB_URL" -c "select current_database(), current_user, version();"Resolve connection, password, DNS, or SSL issues before attempting the full restore.
Step 5: Restore roles, schema, and data
Run the files in a single transaction and stop at the first SQL error:
psql \
  --single-transaction \
  --variable ON_ERROR_STOP=1 \
  --file roles.sql \
  --file schema.sql \
  --command 'SET session_replication_role = replica' \
  --file data.sql \
  --dbname "$NEW_DB_URL"
This is the current command documented in Supabase’s Backup and Restore using the CLI guide.
--single-transaction prevents a partly applied restore when a statement fails. ON_ERROR_STOP=1 makes psql exit instead of continuing past an error. Setting session_replication_role to replica disables triggers during the data load, which can prevent duplicate side effects or double encryption.
For a large backup, run the command inside tmux or screen on a stable machine so an interrupted SSH session does not terminate it.
Step 6: Restore migration history if needed
If the application uses Supabase CLI migrations, the migration history may need to be copied separately. Without it, local migration files and the restored database can appear out of sync.
Supabase documents exporting the supabase_migrations schema and data separately, then restoring them to the destination. Only do this when the history accurately represents the schema you restored.
Step 7: Re-enable Realtime publications
If the source used Supabase Realtime, open Database → Publications in the destination and enable replication for the required tables. Test subscriptions from the application rather than assuming the database restore recreated the dashboard configuration.
Restore a single plain SQL backup
If your backup is one readable .sql file rather than the three Supabase CLI files, use psql:
psql \
  --single-transaction \
  --variable ON_ERROR_STOP=1 \
  --file backup.sql \
  --dbname "$NEW_DB_URL"
Inspect the start of the file before restoring:
head -n 40 backup.sqlLook for database creation commands, ownership statements, extension requirements, and references to roles that do not exist in the destination. A raw pg_dump of every Supabase schema can include platform-managed objects that a normal project database user is not allowed to recreate.
When possible, generate logical backups with supabase db dump because it applies Supabase-specific filtering for reserved roles and internal schemas.
Restore a compressed SQL backup
For a gzip-compressed SQL file, stream it directly into psql:
gunzip -c backup.sql.gz | psql \
  --single-transaction \
  --variable ON_ERROR_STOP=1 \
  --dbname "$NEW_DB_URL"
Streaming avoids creating a second uncompressed file. This is useful when a backup is larger than the free disk space on the restore machine.
With a pipeline, check the exit status carefully. In Bash, enable pipefail so a decompression failure is not hidden by a later command:
set -o pipefail
gunzip -c backup.sql.gz | psql \
  --single-transaction \
  --variable ON_ERROR_STOP=1 \
  --dbname "$NEW_DB_URL"
Restore a custom-format pg_dump archive
Custom-format archives created with pg_dump -Fc must be restored with pg_restore, not psql.
First inspect the archive:
pg_restore --list backup.dump | lessFor a new destination project, a typical starting command is:
pg_restore \
  --verbose \
  --exit-on-error \
  --no-owner \
  --no-privileges \
  --dbname "$NEW_DB_URL" \
  backup.dump
--no-owner avoids trying to assign objects to unavailable source roles. --no-privileges skips grants that may refer to missing roles. These options improve portability, but they can also change the intended ownership and access model. Reapply and verify required grants after the restore.
Do not automatically add --clean to a Supabase restore command. A new Supabase database already contains platform-managed schemas and roles. Dropping objects indiscriminately can damage the destination’s managed setup. Use cleanup options only on a disposable target and only after reviewing the archive contents.
Common Supabase restore errors
Permission errors involving supabase_admin
If schema.sql contains statements such as:
ALTER ... OWNER TO "supabase_admin";Supabase advises commenting out the failing ownership lines when the restore user cannot apply them. Do not broadly delete every ownership or permission statement without understanding its effect.
Permission denied to grant role postgres
If roles.sql tries to grant postgres to cli_login_postgres, the destination may reject it because the restoring role lacks the required admin option. Supabase’s troubleshooting guide recommends commenting out the specific failing grant:
GRANT "postgres" TO "cli_login_postgres" WITH INHERIT FALSE GRANTED BY "supabase_admin";Then rerun the restore on a clean destination project.
Role does not exist
The dump references an owner or grantee that was not restored. Restore roles first, create the necessary custom role, or use appropriate pg_restore ownership and privilege options.
Custom roles with LOGIN require new passwords after migration:
alter user "YOUR_USER" with password 'A_NEW_STRONG_PASSWORD';Relation already exists
The target is not clean, the restore was previously applied partially, or the dump includes objects already provisioned by Supabase. A failed restore inside one transaction should roll back, but not every archive workflow is transactional.
The safest fix is often to create another new project and correct the underlying dump or command before trying again.
Unsupported version in file header
Your local pg_restore is older than the pg_dump version used to create the archive. Install a compatible or newer PostgreSQL client.
Duplicate key or foreign-key errors
Possible causes include existing destination data, triggers firing during import, files restored in the wrong order, or an incomplete backup set. Do not silence the constraint without investigating; a restore that “finishes” with missing or conflicting rows is not successful.
Move the parts outside the database
Restoring PostgreSQL does not finish the Supabase migration.
Storage buckets and files
Database backups do not contain the file bytes in Supabase Storage. Create the destination buckets with the correct public/private setting, size limits, and MIME-type rules, then copy the objects separately.
Do not assume restored rows in storage.objects mean the files exist. Test real downloads from the new project.
Edge Functions
Download or retrieve Edge Function source from your repository, deploy it to the new project, and recreate secrets. The project reference, URL, service-role key, and other environment values will be different.
Auth configuration
Auth users may be present depending on the backup method, but dashboard configuration does not automatically follow. Reconfigure OAuth providers, redirect URLs, site URL, SMTP, email templates, CAPTCHA, hooks, and any custom authentication settings.
Test password login, email confirmation, password reset, OAuth, and token refresh against the new project.
Application environment variables
Replace the old values in your application and deployment platform:
NEXT_PUBLIC_SUPABASE_URL
NEXT_PUBLIC_SUPABASE_ANON_KEY
SUPABASE_SERVICE_ROLE_KEY
DATABASE_URL
Use the names defined by your own application. Never copy the old project’s API keys and expect them to work with the new project.
Webhooks, cron jobs, and external integrations
Review anything that sends email, processes payments, calls third-party APIs, or runs on a schedule. Keep production side effects disabled while validating the restored environment.
Validate the restored Supabase project
A command exiting with status zero is necessary, but it is not enough. Validate the result at several levels.
Database structure
Check tables and extensions:
select table_schema, count(*) as table_count
from information_schema.tables
where table_schema not in ('pg_catalog', 'information_schema')
group by table_schema
order by table_schema;

select extname, extversion
from pg_extension
order by extname;
Compare the results with the source inventory.
Critical row counts
Check the application’s most important tables individually:
select count(*) from public.users;
select count(*) from public.orders;
select count(*) from public.invoices;
Replace these sample names with your real tables. Row counts alone do not prove correctness, but unexpected differences reveal obvious gaps.
Security behavior
Verify Row Level Security and policies with real user sessions. Test anonymous, authenticated, admin, and service-role operations. A table containing the correct rows can still be unsafe or unusable if its grants or policies changed.
Application workflows
Run a focused smoke test:
- Create a test user.
- Sign in and refresh the session.
- Read and write RLS-protected data.
- Upload and download a Storage object.
- Invoke each critical Edge Function.
- Confirm Realtime subscriptions.
- Verify webhooks and scheduled tasks in a non-destructive mode.
- Review application and database logs for errors.
Do not switch DNS or production environment variables until these checks pass.
A safer production cutover plan
For an active application, data can change while you test the restored project. A backup restored on Monday may already be stale by Tuesday.
Plan the cutover based on the acceptable recovery point:
- Announce a maintenance window if writes must pause.
- Stop or queue writes to the source application.
- Create the final backup or select the required PITR point.
- Restore and run automated validation.
- Deploy the application with the new Supabase URL and keys.
- Confirm production reads and writes.
- Keep the old project intact as a temporary rollback option.
- Remove the old project only after the agreed observation period.
For low-downtime migrations, a simple dump-and-restore process may be insufficient because it does not continuously replicate changes made during the restore. Design and test a replication or synchronization strategy rather than improvising during cutover.
Where SupaBackup fits
Supabase’s managed restore workflow is convenient when a supported physical backup exists inside the source project. An independent logical backup solves a different problem: it gives you a portable copy outside that project.
SupaBackup creates scheduled Supabase database backups, encrypts the stream, and sends the result to a Google Drive account you control. If the original project becomes unavailable, you still have an off-site backup that can be restored into another PostgreSQL or Supabase project after decryption.
The restore point is determined by the backup schedule rather than seconds-level PITR. Daily and weekly exports therefore complement, rather than replace, Supabase Point-in-Time Recovery.
Because a remote logical backup downloads data from Supabase, it also consumes database egress. See our guide explaining whether Supabase pg_dump counts as egress when estimating backup costs.
Key takeaways
- Use Restore to a New Project for eligible paid projects with physical backups or PITR.
- Use
psqlfor plain SQL and.sql.gzbackups; usepg_restorefor custom-format archives. - For Supabase CLI backups, restore
roles.sql,schema.sql, anddata.sqlin that order. - Enable required extensions and webhooks before importing the schema.
- Stop on the first restore error instead of accepting a partially restored database.
- Storage files, Edge Functions, Auth settings, API keys, Realtime settings, and secrets require separate work.
- Validate row counts, extensions, RLS policies, authentication, Storage, functions, and application workflows.
- Keep the original project until the restored environment has passed testing.
Restore before you need to recover
The worst time to discover that a backup is incomplete is during a production incident. Create a temporary Supabase project, restore a recent backup, and work through the validation checklist while the source system is healthy.
Once the process is documented and repeatable, recovery becomes an engineering procedure instead of an emergency experiment. If you need encrypted daily or weekly Supabase backups stored in your own Google Drive, start with SupaBackup.